It seems there are a lot of people out there who do cross-compiling for the ARM processor (i.e. Raspberry Pi uses an ARM if I'm not mistaken).
But there aren't many people out there that have done this for a MIPS32 processor.
I noticed that when I built OpenWRT and used the make menuconfig utility to specify the target parameters, it has its own cross-compilation framework and engine in it.
To compile some ADDITIONAL software of your own, you would need to reverse-engineer (and possible recycle and reuse) this framework. Or, you could look into building your own cross-compilation platform.
I looked into the former, and then did some quick web searches to attempt the latter.
In doing the web searches, I began to learn the "methodology" for doing cross compilation in general. The steps seem more or less the same, no matter what kind of platform you are compiling for. It involves building a "toolchain". A Toolchain is essentially defined as "the tools used for cross compilation".
I found a guy who built such a toolchain for MIPS, and began the process using his site as a guide:
http://www.lara.prd.fr/users/oliviermehani/2007ie/mipsellinuxtoolchain
I like the fact that he lays out the process (or, at least, HIS process):
a) Download and Build binutils
b) Download and build gcc
c) Download and build gcc-lib
Another link I came across reaffirmed these steps, but with some additional insight and information.
http://cowlark.com/2009-07-04-building-gcc/
In this link, he explains, for example, why it is important to do your builds from a different directory than where the source is initially downloaded and extracted/spooled.
BTW...in his article he suggests building binutils from an outside directory but the first link does not do this. I was following the first set of steps from Olivier Mehani before I came across this additional link.
So What Went Wrong Initially
I was following the instructions on Oliver Mehani's site "to the letter". Which means that I decided to use the same versions of binutils, gcc and gcclib that he used in the article.
I failed to realize how old these versions were - some of which were going back to 2004 (it is now 2018).
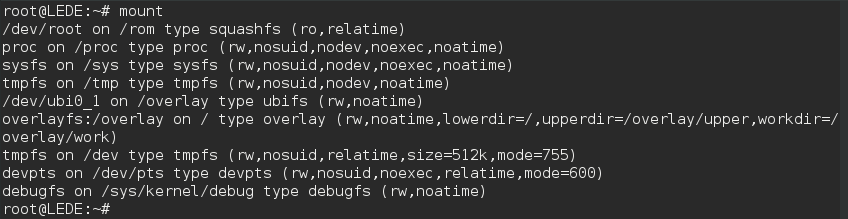
I also failed to realize that the true target, which is OpenWRT running on a former Ubiquity EdgeRouterX device, is a MUCH MUCH newer device and Linux operating system.
In fact, the OS is now called LEDE rather than OpenWRT (OpenWRT split with LEDE and the two have just recently merged back into a single entity and they now use the term LEDE for the OS).
When I downloaded the 2.14 version of binutils, it configured and built (and installed) just fine.
Building gcc also went fine although time consuming (at least on a single or dual core Virtual Machine on VirtualBox running on a Windows 10 laptop).
When I compiled gcclib, I got an error about it being incompatible with the binutils version I was using.
At this point, I began trying some different versions of both binutils as well as the compiler. I first downloaded the most recent versions of these. And got a series of nasty errors on the compile and make processes of gcc.
Later the light bulb went off and I realized that the best practice would be to use the same versions of binutils, gcc and gcclib that were on the target device (again, OpenWRT MIPS32 image I installed on the Ubiquity EdgeRouterX device).
So the versions on that device are:
- binutils v2.27
- gcc v5.4.1
- glibc v5.4.1
The closest ones I could find on the mirrors were:
- binutils v2.27
- gcc v5.4.0
- glibc v5.4.0
GCC Prequisite Dependencies
When I compiled the original 2.13 of binutils and then compiled the 3.3.4 version of gcc on Olivier's page, binutils compiled fine but the gcc produced an error (a data type I believe it was).
So this led to me trying new versions and combinations/permutations of binutils and gcc trying to find a magic combination that would work (configure, make and make install).
Later more recent versions of gcc started to complain about some extraneous packages that it cold not find, telling me I could specify these libraries as compiler options:
configure: error: Building GCC requires GMP 4.2+, MPFR 2.4.0+ and MPC 0.8.0+. Try the --with-gmp, --with-mpfr and.or --with/mpc options to specify their locations.
I did not get these errors on gcc 3.3.4, so I started to get frustrated about the circuitous loop of package dependencies and considered abandoning my effort.
But - via a web search , I learned that that in version 5.4.0 of gcc, a script was packaged in the /contrib directory called "download_prerequisites" and the rather sophisticated script (I did not study it) downloads and positions these packages so that they can be built and incorporated into gcc seamlessly.
NOTE:
I noticed this script was NOT included in version 4.3.3 of gcc, which I later used, but I found that I could port the script from version 5.4.0 to 4.3.3 and it appeared to work.
GCC Version
After initially trying to get 3.3.4 to work, I downloaded version 5.4.0 of the gcc compiler and after pulling down the threads and running the pre-req script to install GMP, MPFR and MPC, I tried to run the configure script which bailed with the error:
"@itemx must follow @item"
TexInfo Error on GCC Configure
Some web searches showed that the issue was the version of texinfo (I was using a recent 5.x version of it on my CentOS7 Linux VM). I downloaded the tool rpmreaper to see if it was safe to uninstall it (it was), and installed a much earlier version of texinfo (4.13) that someone on the web suggested might be valid to use in order to avoid this error. I compiled it and installed it, and tried to run the configure script again on version 5.4.0 of gcc.
The "configure" script in gcc is a VERY long script indeed to run (>30 min) on my laptop. You cannot specify -j X with the configure script, so it is serial, much like a linking process.
Link tests are not allowed after GCC_NO_EXECUTABLES
Finally - after waiting for what seemed like the better part of an hour, the configure process on gcc 5.4.0 bailed out with the following error:
checking dynamic linker characteristics... configure: error: Link tests are not allowed after GCC_NO_EXECUTABLES.
Web searches appear inconclusive, although I do see some people complaining about this issue. Most of the people on these threads suggest that an earlier version of gcc may fix the issue.
So - we will attempt version 4.3.3 of the gcc compiler, which someone on the web suggests may work. First we will do a rm -rf on the gcc-build directory, then download this version 4.3.3 and re-run our configure script again to see if it solves this issue.
Version 4.3.3 of gcc
And off we go. Again. Actually, the configure script on this came back lickety split.
So now we will run, from our gcc-build directory, the "make -j 2" command to try and leverage two cores that we have provisioned on this virtual machine.
And off we go. Again. Waiting. Again.