Thursday, May 10, 2018

OpenWRT on a Ubiquiti EdgeRouterX - Part II

So in Part I, I built the source from scratch and generated an image that I could load onto a Ubiquiti EdgeRouterX device.

This worked - in the sense that I was able to boot that image and get a functional and working OpenWRT (LEDE) image.

The router handed me an IP address like it should have. The router was passing my packets out to the web and back, performing its SNAT functions like a good little router should.

The problems started when I tried to use the package manager.

The first problem I ran into using the package manager was the fact that the urls in the feeds.conf file were not resolving. They were all using openwrt.git.org. This may have been because the git sites for openwrt were down (temporarily). I fixed these urls by looking out on the web for the actual github urls, and commenting out the git.org sites and using the github sites instead.

Once I fixed this issue, I noticed that I kept getting an error from the opkg utility about having zero bytes in the overlay file system.

In looking, I did not have an /overlay file system. I had a directory off the root directory called /overlay.

In doing a google search on this issue I found a number of forum posts but when you clicked them, they links timed out.

Clearly, something went wrong when I built the image.

I typed the mount command, and saw a / mounted on a rootfs file system. I saw a tmpfs on /tmp. But no overlay. I didn't really understand the overlay file system anyway, so I was in trouble there. I knew enough to believe I might be able to manually mount this file system on a device, but I didn't see the device and things looked quite intimidating.

I began to realize that I was quite screwed. I had a router that I could not administratively update or manage because the file system was not "correct". I considered paper clipping (hard reset) the router, but I wasn't sure what that would do since I had replaced the original flash image from Ubiquiti with the one from OpenWRT. It seemed risky to do that.

I finally found a page that allowed me to take a more sensible risk. I found a page that had hardware / firmware images, and I decided to "upgrade" my router with the new image listed on this page. I wasn't sure if that would actually fix the file system layout on the flash or not, and I suspected it wouldn't, but I gave it a try nonetheless.

So after downloading the new flash image, I discovered another issue. This image I had built did not include the Luci GUI, so I needed to do anything and everything via command line. I found a way to upgrade the router via command line with this link:

https://openwrt.org/docs/guide-user/installation/sysupgrade.cli

Using ssh, I copied the downloaded image into a temporary directory and ran the command:
sysupgrade -v /tmp/*.bin
And - lo and behold - after rebooting, I got a new, much superior image and experience. I had the Luci GUI. The file system looked proper.


Now we have a /dev/root on /rom of type squashfs - something we did not see before.
Most importantly, we see the overlayfs mounted on the / folder in a directory called /overlay.
And some others we did not see before, either.

Things look better. We can launch a GUI and we can update our packages now. I installed OpenVPN, for example, which added itself to the "Services" menu.

Tuesday, May 8, 2018

OpenWRT on a Ubiquity EdgeRouterX - Part I

We have been using these Ubiquity EdgeRouter X devices for a while now in here (about a year). They're incredible devices; can't say enough about them.

We were curious to see if you could run OpenWRT on these.

The first thing we had to do is to get some intelligence on the device.

We could have cracked open the case and studied the circuit board, but we didn't do that. By using search engines, we were able to ascertain that it was a 32 bit MIPS processor (MIPS Technologies); MIPS32 1004K. They make a couple of renditions of these chips (i.e. MIPS321004Kc or MIPS321003Kf), the c standing for "coherent" and the f standing for "floating point".

After logging onto the device and looking in /proc/cpuinfo (issuing the command "show hardware cpu" also shows this information), we were able to ascertain that the board (system type?) is MediaTek MT6721 ver:1 eco:3. The processor was confirmed as MIPS 1004Kc V2.15.

So the next step was to figure out how to download and compile OpenWRT on this chipset. This can get hairy and complicated, depending on how much support for the chip there is out in the communities.

As it turns out, if you download OpenWRT on a Linux machine, there is some built-in cross compilation support for MIPS32 right within OpenWRT itself. Apparently the gnu compiler gcc supports the MIPS32 target architecture also, which is nice [ NOTE: validate this ].

If there wasn't, you would need to try to find a toolchain (which has compiler, linker and so forth), and [try to] build OpenWRT from scratch, and this would also include building any and all libraries that the code referenced - a potentially huge job. Just doing the Makefiles could take a week or two.

So to compile it, you need to download the OpenWRT source code (I created a directory called /opt/crosscompile and untarred to that, which creates a openwrt directory) and from the top level directory run "make config", or, in my case, I ran "make menuconfig". Running menuconfig pulls up a curses-based menu that allows you to configure your build - including the options to include in your OpenWRT and target platform specifics for a cross-compile.

Build Options
Originally when I ran this, I went to select the Target System and chose "MIPS Malta CoreLV board (qemu)". There was also an option called "MIPS pistachio". I was confused as to which was the right one. And - YOU BETTER CHOOSE THE RIGHT ONE! If you don't, you can risk bricking (ruining) the device when you try to run the code.

It turns out, that neither is the right one. The correct choice for "Target System" was further down below, called "MediaTek Ralink MIPS" (other than the Mediatek and MIPS, there wouldn't be any easy way to figure this out).

The Subtarget is MT6721, which now starts to make some sense based on the output of what showed up in /proc/cpuinfo on the Ubiquity device. But this subtarget would never have shown up as an option if you didn't get the proper Target System right to begin with.

If you select the proper Target and Subtarget, you get an option for "Ubiquity EdgeRouter X" as the Target Profile.

And finally, for "Target Image", you need to make sure that "ramdisk" is selected because this generates a "img" file that is tarred into a tarball that you will eventually boot into the Ubiquity image loader to boot the OpenWRT image you compile.

I made no changes to the Global Build Settings. Initially, I did select "Build the OpenWRT Image Builder" and "Build the OpenWRT SDK" options in the make menuconfig menu listing, but I had to back these out because the compile was spewing out warnings about library dependencies.

Libraries
Running the build without fully reading the README is almost always a mistake, and it bit me here as well. There is a script called "feeds" that will update and install the dependent libraries. This needs to be run.

This script failed when I ran it, and this COULD be because OpenWRT had an issue with their Github site that day (the mirrors).

I went on the web and did some checking, and the packages I needed in the build seemed to be on https://github.com/XXXXX as opposed to https://openwrt.git.org which is what the scripts were all primed with. So what I did was to fix these urls one at a time, and iteratively kick off the build until it launched with no dependent library warnings.

Build
After the build completed (which took a while - about 2 hours - in a 2 core VirtualBox virtual machine running CentOS7 Linux), I had to figure out where the resultant images were written. They are actually written to the /openwrt/bin/targets folder. The full path is:

/opt/crosscompile/openwrt/bin/targets/ramips/mt7621/openwrt-ramips-mt7621-ubnt-erx-initramfs-factory.tar.

There is also a bin file in this directory as well, but it is the tar you need to load into the device.

Transfer
The next step is secure copy (scp) the tar file into a temporary directory on the Ubiquity EdgeRouterX device. We elected to put it into /tmp.

Then - once copied over, you can log into the UbiquityEdgeRouterX via ssh or through the web console, and go into the temporary directory and type:
"add system image openwrt-ramips-mt7621-ubnt-erx-initramfs-factory.tar"

If this add system command worked you should get a confirmation (i.e. image added). It will place the image on a list of images stored on the device, and mark that image as bootable (apparently it works much like a LIFO queue, where the last image added is the bootable one).

It is now time to reboot the device, by typing "reboot". This is the moment of truth.

But...there is an important step!

Change Ethernet Cable to eth1 on the device!!!!
On the Ubiquity device, eth0 is the management interface, and eth1 is actually the WAN link (eth2-4 are local links).

On OpenWRT, it uses eth0 as a WAN link, and eth1 is the management link.

If you attempt to reboot the device and your cable is [ still ] plugged into the wrong NIC, you will not be able to log in and access the device under OpenWRT.

So switching the cable from eth0 to eth1 is the next step...


Image Re-load
If there any major issues with the image I think adding the image would have flagged that. But the real proof is when you reboot the device.

In our case, the image booted with a "OpenWRT" ASCII MOTD banner, letting you know it booted.
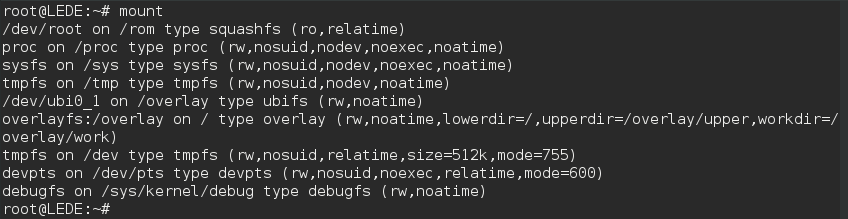
Explore

From here, you can dance around the OpenWRT file systems to your hearts content, as this review stops here.

The only thing I will mention is that I did install the graphical menu for OpenWRT, called Luci.


I will log into that web interface to see what it looks like as I explore OpenWRT.

Thursday, April 26, 2018

SDN Solutions


Note to self: Look into Aryaka Networks
I am told they have a very robust and mature orchestration solution.

Look into Thousand Eyes
Not sure what this is all about.

TCPKali Part II

I've spent about a week testing with this tcpkali tool now.

This is the test case I initially put together, which is to test connections between two CentOS 7 VMs via an Ubuntu VM (IP Forwarder / Router).


The tool spawns worker threads that test connection establishment and bandwidth on each of the connections, both based on an individual thread and collectively.

One thing I did run into with using Lighttpd, is that at high volume levels I kept getting invalid request headers. I wasn't sure if this was tcpkali messing up the headers, or if it was Lighttpd.

So I switched the architecture a bit (based on the suggestion of one of the other engineers in here). Instead of using Lighttd as the web server, I put tcpkali on both sides (left and right) - in client and server mode respectively.


This worked much better than using Lighttpd as a web server. You can send messages and run the server in active or silent mode, returning responses or discarding them.

The tcpkali has some great features. One HUGE feature is the ability to send requests per second with the -r option. The tool attempts to ramp up to the specified number of connections, and if it cannot do this, it will bail without examining throughput measurements. I did notice that it sends data with the -r option DURING the ramp-up period, in addition to after. The tool also has other features like the connect rate, so that if you are establishing 100K connections you can speed up that process by doing 10K or 20K a clip rather than smaller default limits.

What I discovered in the testing I was doing, was that the connection rate had a profound effect on the number of connections you could establish. The default connection rate is 100. And this works fine for up to about 10,000 connections. But if you try to go to higher than that, the rate starts to inhibit your ability to scale the connections and you need to tweak it higher - just not too much higher.
The sweet spot I discovered was a 1,000 : 1 ratio. So 10,000 connections would use a rate of 100 connections per second, 20,000 would use a rate of 200 connections per second, and so forth.

Thursday, April 12, 2018

TCPKali

Today the QA team told me they had selected a tool called TCPKali (but weren't wed to it). They wanted me to download it, compile it, and try it out, as they thought they would use this to test connection scaling from clients running our product.

So I did this yesterday evening. It requires a number of kernel parameters to be changed so you can actually scale. This took me down a deep road of TCP State Transition and TIME WAIT. Rather than just blindly change kernel parameters, I read a couple of good articles on this:

http://developerweb.net/viewtopic.php?id=2941

http://www.serverframework.com/asynchronousevents/2011/01/time-wait-and-its-design-implications-for-protocols-and-scalable-servers.html

Okay...now I know why I am changing the reuse and recycle parms on TIME WAIT.

I actuallly tested this by setting up a Lighttpd web server and using the man page examples. I was thinking Lighttpd would be closing the socket connections down and going into TIME WAIT state but in my testing I saw that the client (TCPKali) was actually racking up sockets in this state until I set those kernel parms which kept that number down to a lower number.

Libnet and Libpcap

In the Jon Erickson book, he discusses the differences between libnet and libpcap.

Libnet is used to send packets (it doesn't receive).

Libpcap is used to filter (receive) packets - it doesn't send.

So you need both modes to have, well, "a full duplex solution".

I downloaded and compiled a bunch of libnet code examples so I can fiddle around and send packets under different example scenarios.  It's fairly easy to use, I think. All in C language.

Libpcap is a library that allows you to initialize a listener that goes into a loop, and you can pass in a BPF (Berkeley Packet Filter) and a Callback function that can handle packets that are fed into the callback function based on the filter criteria.

I had issues running the libpcap on VirtualBox virtual machines that had a bridged interface to the host. I need to re-run the code from the libpcap tutorial I was doing on a dedicated Linux box, or maybe change the adaptor type on the Virtual Box VMs.

Security and Hacking - Part I

I don't usually write much about Security and Hacking, but I will need to do a little bit of that because that is what I have been working on lately.

I went to the RSA show a couple years ago and that bootstrapped my involvement in security. The Dispersive DVN, after all, is all about Security.  We have had a number of people come in and Pen Test the networks, and I have read those reports.  Recently, as part of Research, once I finished Orchestration, they asked me if I would bolster my skills in this area and do some internal pen testing of our network.  This is a big undertaking, to say the least.

I started with a book called Hacking (2nd Edition), The Art of Exploitation, by Jon Erickson. This book is not for the script kiddies. It uses practical Assembler and C examples on a (dated) version of Ubuntu that you compile and run as part of going through the book.  I have gone through the entire book, page by page. I've learned some very interesting things from this book. Where I kind of got lost was in the ShellCode sections - which is essentially the one key point that separates the port scanners and tire kickers from the guys who know how to actually exploit and break into networks and systems.  I will need to go through this book, and these sections, probably iteratively to actually master the skills presented in this book.

I've built a "Pen Testing" station - on an Ubuntu VM and this VM is essentially my "attack plane" for the OpenStack network. It sits outside the OpenStack networks but can route to all of the networks inside OpenStack via the OpenStack router.

So far, I have run a series of half-open port scans and documented all of the ports I've been finding open on various network elements.

It appears that someone in a Load Testing group is trying to lasso me out of research and "make" me join this load testing team, which will make this an extracurricular effort if they succeed in doing this.

SLAs using Zabbix in a VMware Environment

 Zabbix 7 introduced some better support for SLAs. It also had better support for VMware. VMware, of course now owned by BroadSoft, has prio...